Got2Go is an accommodation and event marketplace, with no fees for PMs (0% commission).
With Got2Go, you can:
- List unlimited properties for free
- Receive payments instantly (when a guest books)
- Use your own cancelation policies
- Get new types of travelers including event travelers, Go+ members, more
- Receive ongoing support from the Got2Go partnership team anytime
*For any PM with properties in the US
If you’re a Hostaway user, you can easily list your properties on Got2Go.
Important info to know
Step 1: Create a new API key in your Hostaway dashboard
- Search for “Got2Go” in the Hostaway Marketplace (here’s the direct link to the page)
- Click “Connect”
- Click “Create” (to create the API key)
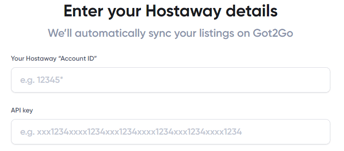
- Save the “Account ID” and “API key” (important: copy the API key, it will only appear once)(Alternatively, you can create a new API key on the Hostaway “Settings” screen, see this article )
Step 2: Sign up with Got2Go
- Go to this link and complete our partner signup process. Select "Hostaway" to start the process.
- You'll need to enter your OwnerRez Account ID within the form. Use the keys Ctrl+V (Windows) or Cmd+V (Mac) to easily paste it into this field.
- If setup successfully, you should see the following:

Select "Next" at the bottom right of the screen to continue. If you receive an error at this stage, contact partners@got2go.com. - If you already have a Got2Go account, you can sign in now. We do not recommend sharing personal travel accounts, so it may be worth creating an account under a shared business email for dashboard access. Use the "Sign up" link on this page if needed to create a new account and proceed.

- After logging in, confirm the requested details of your company then select "Next". Use the best contact details for Got2Go to contact your company.
- Enter your business address and select "Next". Use the primary business address for your company.
- Complete the following email and phone number fields then select "Next". Use the contact details you'd like guests who book your properties to receive.
- Complete the following page to help us QA and test your properties easily then select "Next".
- If you have any feedback, things to test, or other requests and important information to share with us let us know then select "Next". Feel free to share with us anything at all!
- Review our partners terms and agreement, and select the applicable boxes, then select "Next".

- You'll now be able to see your properties live on Got2Go through your host dashboard. Select "Go to my Partner Dashboard" to continue.
- That's it! Your properties and data should start to sync and will be ready for you to review.
Step 3: Your properties go live on Got2Go
- After your properties are live, feel free to contact our partners team at partners@got2go.com for any questions, any time.
- You'll be able to quickly see your properties on Got2Go through the Partner Dashboard at https://got2go.com/partner. Make sure to log into the same account you established the connection with in Step 2. You'll be able to learn more about the Partner Dashboard here.